Xbee
Set Xbee and Point to Point Network
- Connect your Xbee via arduino
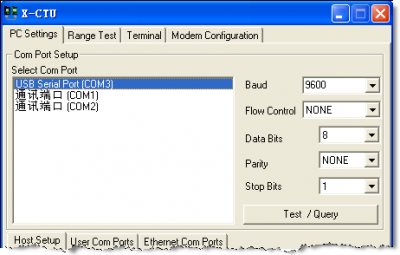
- In the PC setting tab, set the baud rate at 9600, 8N1 for arduino serial port, click test/query
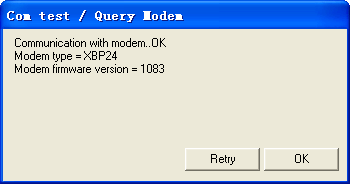
- If the xbee can correctly read, you will see:
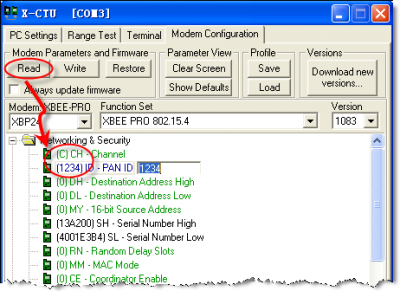
- turn to tabe "Modem Configuration" and click "read", in "Networking & Security" section, set channel to C and Pan ID to 1234
- repeat the process for another Xbee, then the point to point network is built
Test
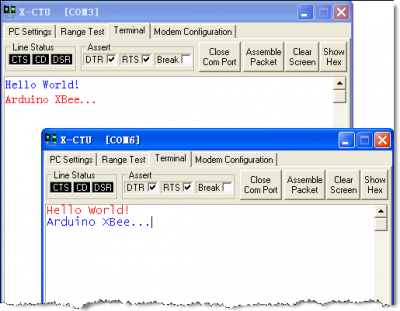
- Turn to Terminal tab, any words typed will display on other xbee terminal
Arduino Demo Testing code
Using two xbee on arduino together, change the B to A, and A to B in the following code, vice verse to another one. Then in one arduino you will receive AAA... and another you will receive BBB..
int ledPin = 13;
int val;

void setup() {
  pinMode(ledPin, OUTPUT);
  Serial.begin(9600);
}

void loop() {
  // send data to another XBee module
  Serial.print('B');
  delay(1000);

  // receive data from another XBee module
  val = Serial.read();
  if (-1 != val) {
    if ('A' == val) {
      digitalWrite(ledPin, HIGH);
      delay(500);
      digitalWrite(ledPin, LOW);
      delay(500);
    }
  }
}
RSSI
* Demo video can be found on this page: https://www.youtube.com/watch?v=1Bz95LL5tZ4
/*
 XbeeRSSI.pde

 This is a sketch for RSSI-Measurements. The sketch reads the incoming RSSI Value and turns on a LED if the Signal is strong enough.
 Please note that the used Value (40) depends on your project environement.

 ATTENTION!!!
 ---------------------------------------------
 YOU HAVE TO USE AN ARDUINO WITH AT LEAST TWO SERIAL PORTS!
 I am using an Arduino MEGA!
 Connect your Xbee RX to Arduino RX!
 Connect your Xbee TX to Arduino TX!
 And don't forget the power supply!
 RSSI Pin on Xbee -> 6
 ---------------------------------------------


 Author: Cédric Portmann ([email protected].)
 Copyright (C) 2013 Cédric Portmann
*/

int digitalPin = 10;  // the RSSI pin 6 of Xbee is connected to this PWM Pin. (Digital Pin 10)
int rssiDur;  // Variable for RSSI
int led = 13;  // LED connected to Pin 13

void setup()
{
  pinMode(led, OUTPUT);
  pinMode(digitalPin, INPUT);

  Serial.begin(9600);   // this is the connection for your Arduino to your PC/MAC
  Serial3.begin(9600);   // this is the connection of your Xbee to your Arduino MEGA!!

}

void loop()
{

  if(Serial3.available() >= 21) {    // This isn't important. You can do here whatever you want.

    if(Serial3.read() == 0x7E) {  // Reads the start byte
      for(int i = 1; i < 19; i++) {
        byte discardByte = Serial3.read();


        rssiDur = pulseIn(digitalPin, LOW, 200); // get's the RSSI Value
        Serial.println(rssiDur);  //for debbuging and first setup.

      if(rssiDur < 40 && rssiDur != 0){  //turns Led on if RSSI is less then 40
       digitalWrite(led, HIGH);
      }
      if(rssiDur > 40 && rssiDur != 0){ //turns Led off if RSSI is bigger then 40
       digitalWrite(led, LOW);
      }

      }

    }
  }
}


