ESP8266 IoT
(Redirected from ESP IOT)
AI-Thinker AI-Link
- make sure you are using at least 1.2 version AT firmware (run cloud update first)
- Turn on the APP "AI-link" in your android cell phone
- enter the wifi SSID and password and click "start"
- set on module
- set mode AT+CWMODE=1
- run command on the module to start
AT+CWSMARTSTART=0
- now the serial monitor will show up the wifi SSID and password info and automatically connect it.
OK
SMART SUCCESS
SSID:TP-LINK_4226
PASSWORD:1234567890
- Try to make a ping test
AT+PING="www.baidu.com"
+42
OK
Espressif ESP-Touch
- make sure you are using at least 1.2 version AT firmware (run cloud update first)
- Turn on the APP "smarthome" in your android cell phone
- click "smartlink" and enter wifi details then connect
- Set on module
- AT+CWMODE=1
OK
- AT+CWSMARTSTART=1 // using mode 2, slower
OK
WIFI DISCONNECT
SMART SUCCESS
SSID:TP-LINK_4226
PASSWORD:1234567890
OK
WIFI CONNECTED
WIFI GOT IP
- Try to make a ping test
AT+PING="www.baidu.com"
+42
OK
Wechat Air-Kiss
Smartlink mode
- AT + CWSMARTSTART = 0 AI-LINK intelligent connections advantages: fast, the router is compatible with the best available in the phone is not connected to the case under the Wi-Fi configuration. Cons: Wi-Fi will cause the phone offline. Principle and current connection socket using the same small k.
- AT + CWSMARTSTART = 1 ESP-TOUCH intelligent connection Advantages: Wi-Fi will not disconnect the phone Disadvantages: slow, very few router may have compatibility issues.
- AT + CWSMARTSTART = 2 Airkiss intelligent connections advantages: support micro-channel hardware platform. Cons: Almost not own designs APP calls.
Lan service
- AT+LANSTART
Cloud Send
- AT+CIFSR make sure connect to internet
- AT+CIPSTART="UDP","iot.ai-thinker.com",5001
- AT+CLDSTART // cloud send start
- AT+CLDSTOP // cloud send stop
- AT+CIPMODE=1
- AT+CIPSEND
- {"type":"signin","name":"ai-thinker","password":"12345"}
- {"type":"connect","from*:*ai-thinker","to*:*anyone","password*:*anyonePassword"}
- {"type":"disconnect"}
- {"type":"signout","name":"ai-thinker","password":"12345"}
Reference link
ESP Cloud Data
NodeMCU w/relayr
- https://github.com/sheenhx/esp8266/tree/master/DHT22%20temperature
- SDK: https://developer.relayr.io/documents/Welcome/Introduction
Data Logging Platform
- https://thingspeak.com
- https://www.particle.io/prototype#cloud
- https://data.sparkfun.com/
- https://thinger.io/
MQTT
Cloudmqtt with NodeMCU
- https://www.cloudmqtt.com/docs-nodemcu.html
- Reference example code at https://github.com/nodemcu/nodemcu-firmware/blob/master/lua_examples/mqtt/mqtt2cloud.lua
- API page: https://github.com/nodemcu/nodemcu-firmware/wiki/nodemcu_api_en
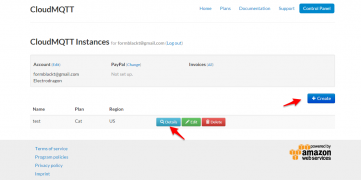
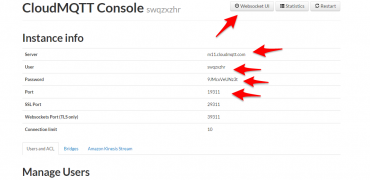
Cloudmqtt setup
m=mqtt.Client("nodemcu1",60,"swqzxzhr","9JMcxVeUNz3t")
m:connect("m11.cloudmqtt.com",19311,0,1)
Modified example code
-- test with cloudmqtt.com
m_dis={}

function dispatch(m,t,pl)
	if pl~=nil and m_dis[t] then
		m_dis[t](m,pl)
	end
end

function topic1func(m,pl)
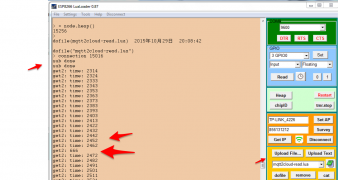
	print("get1: "..pl)
end

function topic2func(m,pl)
	print("get2: "..pl)
end

m_dis["/topic1"]=topic1func
m_dis["/topic2"]=topic2func

-- Lua: mqtt.Client(clientid, keepalive, user, pass)
m=mqtt.Client("nodemcu1",60,"swqzxzhr","9JMcxVeUNz3t")

-- Lua: mqtt:connect( host, port, secure, auto_reconnect, function(client) )
m:connect("m11.cloudmqtt.com",19311,0,1)

-- ON callback event "connect", subscribe to topic and start the first publish
m:on("connect",function(m)
	print("connection "..node.heap())
	m:subscribe("/topic1",0,function(m) print("sub done") end)
	m:subscribe("/topic2",0,function(m) print("sub done") end)
	m:publish("/topic1","hello112",0,0) m:publish("/topic2","world211",0,0)
	end )

-- ON callback event "offline"
m:on("offline", function(conn)
    print("disconnect to broker...")
    print(node.heap())
end)

-- ON callback event "message", and print on NodeMCU monitor
m:on("message",dispatch )

-- intervally publish the time
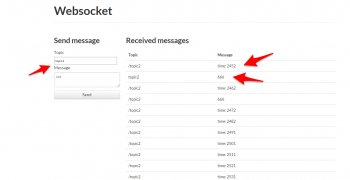
tmr.alarm(0,10000,1,function() local pl = "time: "..tmr.time()
	m:publish("/topic2",pl,0,0)
	end)
More reference
- test.mosquitto.org


