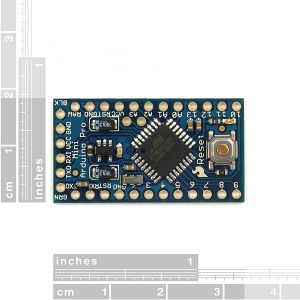
Arduino Pro mini
Usage
- For wiring, our EDarduino pro mini works good with our FTDI basic, you only need to connect them together and to your PC USB port.
- For driver, you need to install both FTDI board driver firstly and then pro mini driver further, so you should have two drivers installed
- Finally you should see the com port availabe in arduino IDE, and available to program.
- upload the blink sketch, you see the LED 13 on the right of the front of the board, and power led in the middle of the board.
BOM
- Schematic see category: Arduino Boards page
This BOM list is not yet typeset, please click the "source" of this page on the right top and copy/paste into notepad
- Part Value Package Library Position (inch) Orientation
- C1 0.1uF C0402 SparkFun (0.525 0.365) R180
- C2 0.1uF C0402 SparkFun (0.125 1.1) R90
- C3 0.1uF C0402 SparkFun (0.525 0.31) R180
- C10 0.1uF C0402 SparkFun (0.235 0.78) R90
- C13 10uF EIA3216 SparkFun (0.2 0.95) R90
- C19 10uF EIA3216 SparkFun (0.53 0.95) R90
- D3 Green LED-0603 SparkFun (0.55 0.1) R180
- JP1 FTDI Basic 1X06 SparkFun (0.1 1.25) MR180
- JP2 1X02 SparkFun (0.55 0.7) MR90
- JP6 1X12 SparkFun (0.65 1.15) MR270
- JP7 1X12 SparkFun (0.05 0.05) MR90
- LED1 Red LED-0603 SparkFun (0.35 0.85) R270
- Q1 #MHz RESONATOR-SMD SparkFun (0.15 0.765) R90
- R2 10K C0402 SparkFun (0.2 0.15) R90
- R6 330 C0402 SparkFun (0.55 0.2) R270
- R11 10K C0402 SparkFun (0.35 1.05) R180
- S2 Reset TACTILE_SWITCH_SMD SparkFun (0.35 0.15) R180
- U$2 FIDUCIAL1X2 FIDUCIAL-1X2 SparkFun (0.5 0.15) R0
- U$4 FIDUCIAL1X2 FIDUCIAL-1X2 SparkFun (0.2 1.15) R0
- U1 ATMEGA168# TQFP32-08 SparkFun (0.35 0.55) R315
- U2 ###V SOT23-5 SparkFun (0.35 0.95) R90
