Arduino Pro Micro
Revision as of 19:02, 15 May 2017 by Chao (talk | contribs) (Created page with "== Documentation == * Schematic of Pro Micro * Eagle files * Atmega_32u4 Datasheet * [https://dlnmh9ip6v2uc.cl...")
Documentation
How to use
Pro Micro can run directly as leonardo board, or use this board file: SF32u4_boards.zip
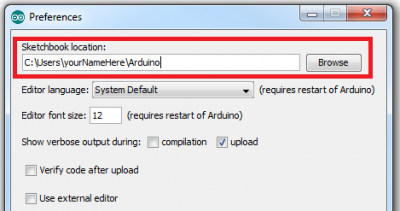
Grab this zip folder, which is kind of an addon to Arduino, and unzip it into a hardware directory within your Arduino sketchbook. Where's your Arduino sketchbook? Well, by default, it should be in your My Documents folder, but to double check you can go to File > Preferences within Arduino and see the Sketchbook location text box. Just make sure you close all Arduino windows once you're done.

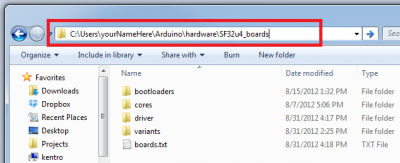
Once you've unzipped that folder into the hardware folder within your Arduino sketchbook (you may actually have to create a hardware folder), your directory structure should look something like this:

Demo Code
int RXLED = 17;  // The RX LED has a defined Arduino pin
// The TX LED was not so lucky, we'll need to use pre-defined
// macros (TXLED1, TXLED0) to control that.

void setup()
{
 pinMode(RXLED, OUTPUT);  // Set RX LED as an output
 // TX LED is set as an output behind the scenes

 Serial.begin(9600); //This pipes to the serial monitor
 Serial1.begin(9600); //This is the UART, pipes to sensors attached to board
}

void loop()
{
 Serial.println("Hello world");  // Print "Hello World" to the Serial Monitor
 Serial1.println("Hello!");  // Print "Hello!" over hardware UART

 digitalWrite(RXLED, HIGH);   // set the LED on
 TXLED1; //TX LED is not tied to a normally controlled pin
 delay(1000);              // wait for a second
 digitalWrite(RXLED, LOW);    // set the LED off
 TXLED0;
 delay(1000);              // wait for a second
}